Importing GeoJSON
When to import
Section titled “When to import”Import is the right path when you have a GeoJSON file from a public source (DFO, NOAA, BC Data Catalogue, etc.) or from a colleague. For drawing your own zones one at a time on a map, see Drawing & editing.
Open the dialog
Section titled “Open the dialog”- From your population’s administration page, click Management Areas in the sidebar.
- Click into a layer (or New layer if you’re starting fresh — the import targets a specific layer).
- On the canvas page (the per-layer view with the map), click Import GeoJSON in the top toolbar.
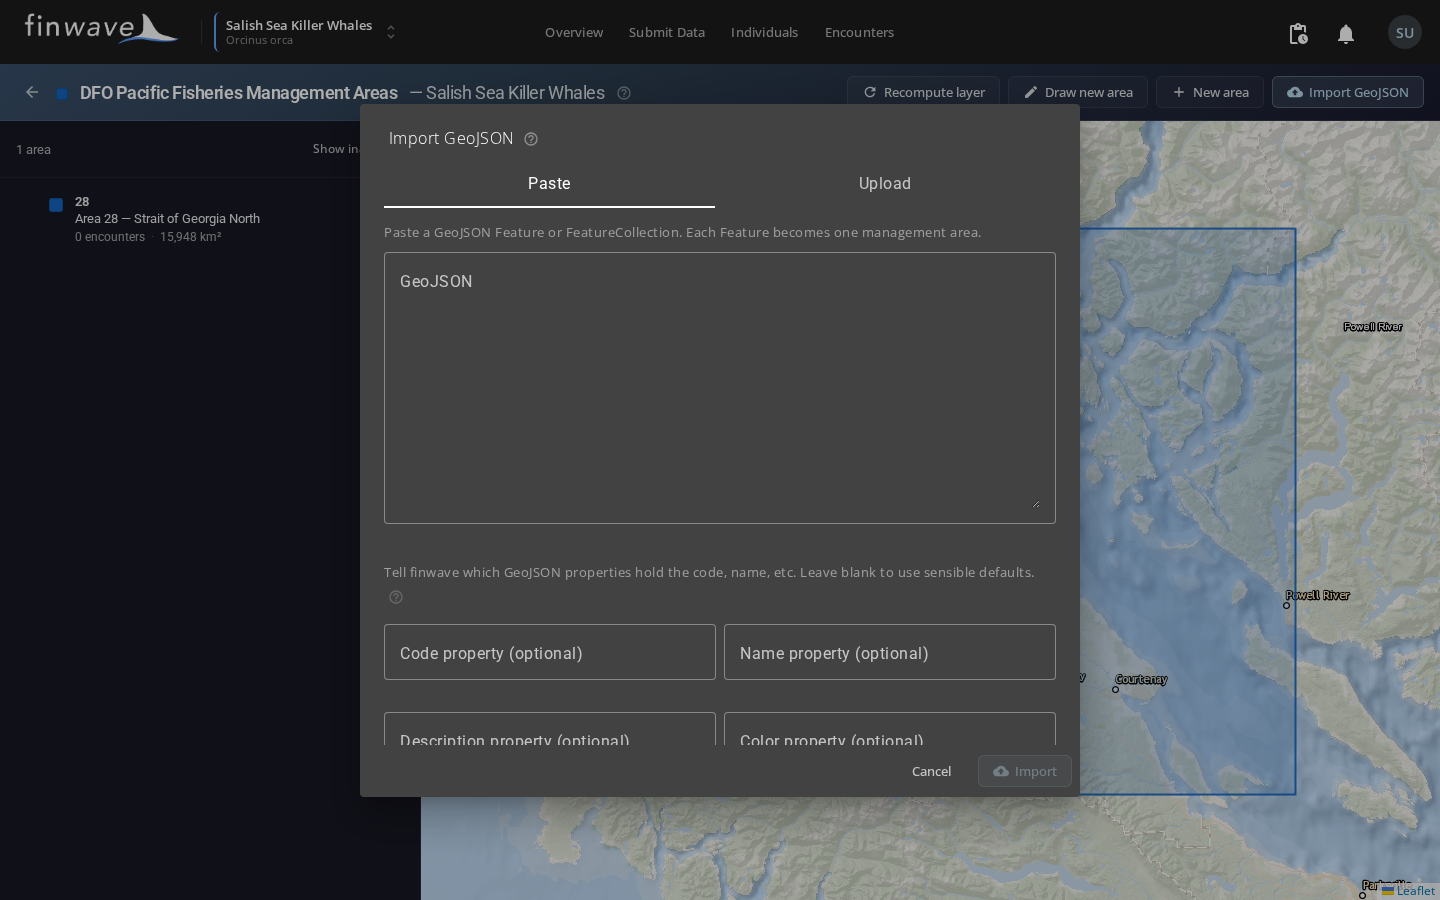
The dialog
Section titled “The dialog”The dialog has two tabs at the top:
- Paste — drop the JSON straight into the textarea. Good for small files or one-off polygons.
- Upload — pick a
.geojsonor.jsonfile from disk. Good for big files (hundreds of polygons).
Either way, finwave parses the input as you type/select and shows a confirmation just below: “Ready to import 581 feature(s).” If parsing fails, you’ll see exactly which JSON error and where.
Property mappings
Section titled “Property mappings”Below the parser status are four optional override fields:
| Field | What goes here |
|---|---|
| Code property | Name of the GeoJSON property that holds each feature’s stable code. For DFO PFMAs use LABEL. Leave blank to use defaults: code, id, PFMA_NAME, AREA_NAME. |
| Name property | Property holding the human-readable name. For DFO use MANAGEMENT_AREA_NAME. Defaults: name, NAME, AREA_NAME. Falls back to the Code if missing. |
| Description property | Optional. Long-form description if your data has one. Defaults: description, DESCRIPTION. |
| Color property | Optional. A 6-char hex color (no leading #) per feature. Defaults: color, fill. If absent, finwave derives a color from the Code so areas read distinctly on the map. |
Parent code property (sub-area wiring)
Section titled “Parent code property (sub-area wiring)”If your data has a property that names each zone’s parent (like DFO’s MANAGEMENT_AREA), put that in the Parent code property field.
When set, the importer:
- Imports each feature as a child area.
- Reads the parent code value (e.g.
28for a feature whoseLABELis28-1). - If a parent area with that code already exists in this layer, links the child to it.
- If no parent exists, synthesizes one — its geometry is the union of all children pointing at it, and its name defaults to its code (e.g.
Code = 28, Name = "28"). You can rename synthesized parents afterwards from the layer’s canvas page.
This is what gives you a clean two-level hierarchy from a single subarea-level file.
Overwrite by code
Section titled “Overwrite by code”Off by default. With it off, importing a feature whose code already exists in this layer will skip that feature and add an entry to the result table.
Turn it on when you’re refreshing a layer with a newer version of the same dataset. The importer will replace the existing area’s name, description, color, and geometry with the new values, while keeping the area’s database ID stable (so encounter assignments don’t lose history).
After import
Section titled “After import”The importer reports four counts:
- Created — new areas added to the layer.
- Updated — existing areas replaced (only if you ticked Overwrite by code).
- Skipped — features rejected because of duplicate codes (when overwrite is off) or for other reasons listed in Errors.
- Errors — features that couldn’t be imported. Each row tells you the feature index in your file plus the reason. Common reasons:
- “Code must be 1-32 chars matching
[A-Z0-9-_]” — usually means the feature has an empty or whitespace-only label, or a code with disallowed characters. Fix in the source file or use a different code property override. - “Geometry must be Polygon or MultiPolygon” — your data has Points or Lines mixed in. Filter the source.
- “Geometry is invalid (self-intersecting or malformed)” — the publisher’s polygon has a topology issue. Open in QGIS or mapshaper to inspect.
- “Code must be 1-32 chars matching
After a successful import, finwave automatically queues a layer-scoped recompute to re-tag every encounter in the population that falls inside any of the just-imported polygons. You’ll see the job in your job menu; it usually finishes in seconds for small populations and under a minute for larger ones.
Importing into an existing layer vs creating a new one
Section titled “Importing into an existing layer vs creating a new one”The import endpoint always targets a specific layer. The two paths to get there:
- Add to an existing layer: open the layer’s canvas page → Import GeoJSON. The new features are added (or merged via overwrite) into that layer.
- Make a new layer for this dataset: from the layers list, click New layer, fill in the name (
DFO PFMAs 2024) and source (DFO), save. Then open the empty layer and import.
Use a fresh layer when the dataset is independent (DFO vs internal). Reuse an existing layer when you’re refreshing or extending the same dataset.